
Nadia stared at her living room after dropping $2,000 at a big box store and hated everything about it. The new sofa felt tiny against the bare walls.
She finally understood why my home looks cheap despite spending real money on new items. The scale, lighting, and layout were completely wrong for the space.
She researched exact design rules to fix these frustrating errors. This guide reveals the six exact changes she made to correct her proportions without spending another dime.
The Room Elevation Engine
Toggle the 6 design rules to transform this generic space into an expensive-looking sanctuary.
Stop Buying the Postage Stamp Rug
The most common living room mistake starts directly under foot. Nadia originally bought a 5×8 rug because it looked large enough rolled up in the store aisle.
Once unrolled, the small rug made her entire space feel disconnected and tiny. The sofa and chairs hovered around the edges awkwardly. This gave the room a temporary, unfinished feeling.
Rugs act as the foundation of the room. A small rug visually shrinks the square footage of any living area. It makes standard furniture look oversized and clumsy.
During her research, Nadia found a helpful quote from interior designer Emily Henderson. Henderson states that a rug is the foundation of a room and the furniture plan. Everything should feel grounded by it.
To fix this, the front legs of all seating must sit fully on the rug. This anchors the furniture together into a cohesive conversation zone. Nadia realized her living room actually needed an 8×10 size.
She swapped her tiny rug for a Safavieh 8×10 textured wool area rug. It cost her around $250 online. The difference in scale completely transformed the room instantly.
She also learned this is a growing trend. Pinterest trends for 2026 show massive search volume growth for large statement rugs. People are finally abandoning tiny, floating textiles.
Correct area rug size prevents cheap looking home decor from ruining a layout. Getting the base layer right makes every other furniture choice easier.
Nadia measured her floor space twice before ordering the new rug. She mapped out the 8×10 dimensions using painters tape on the floor. This visual trick proved the larger size would fit perfectly.
She noticed her coffee table finally looked properly proportioned. Before, the table swallowed the tiny 5×8 rug underneath it. Now, the table sat comfortably in the center of the textured wool.
Choosing a solid, textured material also helped hide dirt and footprints. A larger rug requires more vacuuming, but the visual payoff is immense. The room felt instantly grounded and expensive.
Nadia realized that foundation elements dictate the rest of the room. This rug mistake taught her to always measure twice. Next, she had to confront her matching furniture problem.
Area Rug Sizing Reference Chart
| Room Size | Furniture Setup | Recommended Rug Dimensions |
| 10×12 feet | All legs off rug | 5×8 feet (Not recommended) |
| 11×13 feet | Front legs on rug | 8×10 feet |
| 12×18 feet | All legs on rug | 9×12 feet |
| 14×20 feet | All legs on rug | 10×14 feet |
Step Away from the Matching Furniture Set
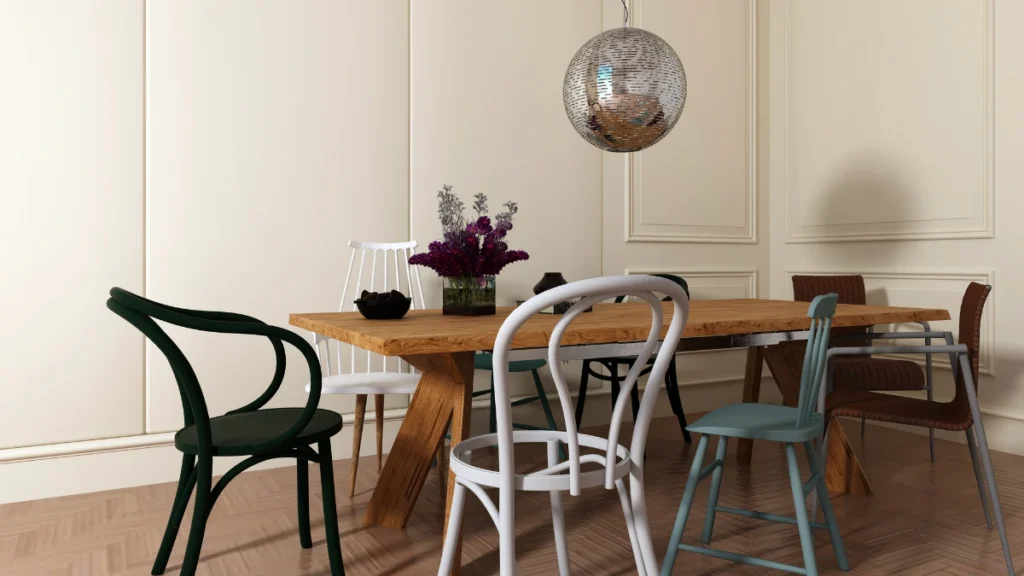
Buying an entire showroom bundle feels incredibly tempting at first. Store displays make purchasing a matching sofa, loveseat, and chair seem foolproof. Nadia fell for this trap because it promised a quick fix.
She ordered a complete matching velvet set to fill her empty room. When the delivery arrived, her living room instantly looked like a hotel lobby. It lacked personality entirely and felt completely generic.
Nadia learned that showrooms sell matching furniture sets simply to speed up sales. They want buyers to spend more money in a single transaction. This is one of the most common redecorating mistakes people make.
She read a powerful piece of advice from interior designer Nate Berkus. He noted that people do not need matching sets. A room should feel collected over time.
This concept of a curated space changed everything for Nadia. She decided to break up her matching velvet pieces. She moved the matching loveseat into her guest bedroom instead.
Replacing the loveseat with a contrasting leather accent chair added instant depth. Mixing wood tones with distinct metals and fabrics creates visual interest. Nadia added a walnut side table next to her metal lamp.
Search queries for mixing wood tones peak every January and September. People constantly look for ways to make their spaces feel warmer. Mismatched but cohesive furniture achieves this expensive look naturally.
According to the 2024 Houzz and Home Study, the median living room remodel costs $4,000. Spending a large chunk of that on a matching set limits future design choices.
Curated spaces look expensive because they appear collected over decades. A room filled with varied textures tells a personal story. Nadia finally saw her living room reflecting her actual taste.
She focused on tying the mismatched pieces together with repeating colors. A caramel leather chair paired beautifully with caramel throw pillows on the sofa. This trick made the room feel intentionally designed.
Breaking the showroom set habit took some confidence initially. However, the result looked far more sophisticated than a catalog copy. Her furniture finally felt right, but the room still felt stark at night.
Stop Relying on the Big Overhead Light

Flicking on a single builder grade ceiling fixture destroys a room instantly. Overhead lights create harsh shadows that wash out wall colors. Nadia hated turning on her main ceiling light after dinner.
The bright overhead glare made her new furniture look flat and cheap. It highlighted every speck of dust on the coffee table. She realized that expensive homes always use layered lighting setups.
Good lighting design requires multiple light sources at different heights. This is a crucial secret for how to make a room look expensive. Nadia decided to ban the big overhead light completely.
She started by learning the three crucial types of lighting required for any room:
The Three Layers of Light
Curated by The Plan Decor
Ambient Lighting
Ambient lighting provides general illumination across the whole room, acting as the foundational base of your spatial design.
Task Lighting
Task lighting offers focused light for reading or working, adding both high functionality and targeted brightness.
Accent Lighting
Accent lighting highlights specific architectural features or artwork, creating dramatic focal points and visual depth.
Nadia added a Studio McGee for Target ribbed ceramic table lamp. It cost around $60 and added immediate warmth to her side table. The ceramic texture brought a high end feel to the corner.
Next, she placed a tall brass floor lamp behind her accent chair. This created a dedicated reading nook with soft, focused illumination. Layering light at eye level removes those terrible ceiling shadows.
She discovered that updating lighting is a top priority for 51 percent of renovating homeowners. This statistic made perfect sense once she saw the transformation. Proper lighting hides flaws and highlights beautiful textures.
Nadia swapped all her harsh daylight bulbs for warm white versions. Warm bulbs cast a golden, cozy glow across the room. She aimed for bulbs with a color temperature around 2700 Kelvin.
To complete the layered look, she installed two plug in wall sconces. These sconces flanked her large mirror and bounced light across the room. Plug in sconces require no hardwiring or electrical skills.
Her living room finally felt like a cozy retreat every evening. The soft pools of light invited people to sit and relax. She never touched the main ceiling switch again.
Nadia learned that lighting sets the entire mood of a space. Beautiful furniture looks terrible under bad lighting. Fixing the light distribution led her to examine her bare windows next.
Raise Your Curtain Rods to the Ceiling
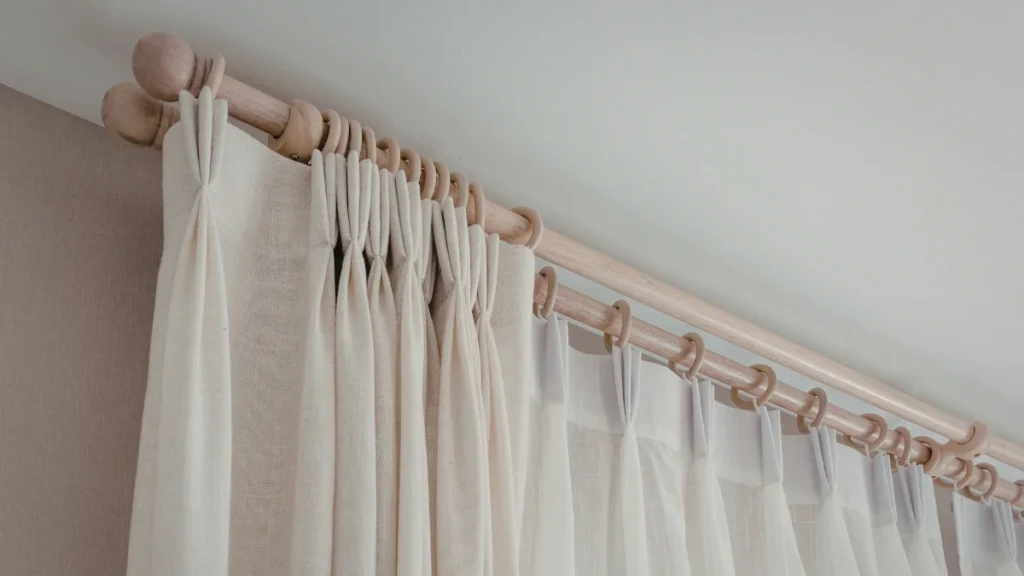
Low curtain rods shrink the ceiling height dramatically. Nadia originally installed her rods sitting right on the window trim. This made her standard ceilings feel like a dark cave.
Hanging curtains too low cuts the wall in half visually. It stops the eye from traveling upward toward the ceiling. Nadia read several articles about proper curtain hanging rules to fix this.
She learned she needed to mount her rods much higher. The golden rule is to place the rod higher above the window trim. She moved her hardware up near the ceiling line.
She also extended the rods much wider than the window glass. Placing the rod wider allows the curtains to frame the window. This trick makes the window itself appear massive.
Nadia purchased IKEA RITVA curtain panels for around $40 per pair. These affordable panels look incredibly similar to expensive custom linen drapes. She bought the longest length available to ensure a proper fit.
Curtain panels must physically kiss the floor to look custom. High water curtains that float above the baseboards look like a mistake. Nadia hemmed her new panels to brush the floor perfectly.
Proper window treatments make ceilings appear up to 15 percent taller. Her living room suddenly felt airy and grand. This simple height adjustment completely changed the room proportions.
Fixing window treatments is an affordable way to elevate a space. Nadia realized her low curtains were a major reason her home felt completely wrong. The high and wide method is a designer staple.
She used heavy duty wall anchors to support the longer rods. Long curtains carry more visual weight and require sturdy hardware. The new setup framed her outdoor view beautifully.
With the vertical space finally looking tall and elegant, Nadia looked down. She realized her horizontal floor plan needed serious attention. Her furniture placement felt stiff and awkward.
Curtain Height and Length Guide
| Ceiling Height | Recommended Rod Placement | Required Curtain Length |
| 8 feet | 2 inches below ceiling | 96 inches |
| 9 feet | 4 inches below ceiling | 108 inches |
| 10 feet | 6 inches below ceiling | 120 inches |
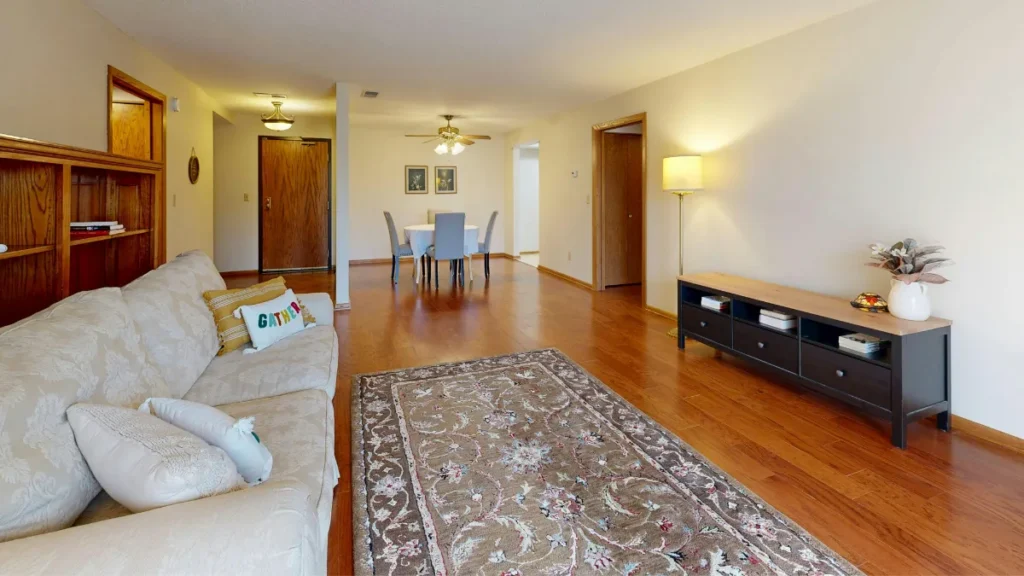
Pull Your Furniture Away From the Walls

Pushing every piece of furniture flat against the walls creates a sterile environment. Nadia originally lined her sofa and chairs against the perimeter of the room. The setup looked exactly like a doctor waiting room.
This layout left a massive, dead void of empty floor in the center. People had to shout across the room to have a simple conversation. Nadia realized this awkward spacing was why my home looks cheap.
She learned about the concept of floating furniture from a design blog. Floating furniture simply means pulling pieces away from the walls. This creates intimate, functional conversation zones in the center of the room.
Nadia pulled her sofa a few feet closer to the middle. She angled her accent chairs to face the sofa directly. The new furniture layout felt instantly cozy and purposeful.
Even in small rooms, giving furniture breathing room works wonders. Pulling a sofa just a few inches off the wall creates a shadow line. This shadow line gives the illusion of a larger, deeper room.
Research shows that floating furniture increases usable conversational space drastically. When seating sits closer together, the room feels warmer and more inviting. People naturally lean in and engage with each other.
Moving pieces inward also improves room traffic flow significantly. Guests can easily walk behind the sofa to reach the kitchen. Nadia loved having clear pathways around the perimeter of her living room.
She anchored this new floating layout with her large area rug. The rug connected the floating pieces into one cohesive island. The dead void in the center of the room vanished completely.
Nadia realized that empty floor space does not equal a bigger room. Grouping furniture intentionally makes a home feel professionally designed. The layout finally felt functional and comfortable for entertaining.
She spent zero dollars fixing this massive spatial error. She simply pushed her heavy sofa across the floor. With the large elements perfectly placed, she tackled the small clutter next.
Swap Tiny Knick Knacks for Statement Pieces

Visual clutter ruins expensive aesthetics faster than anything else. Nadia originally tried to decorate her shelves with dozens of tiny objects. She bought cheap candles, small frames, and tiny fake plants.
Cluttering shelves with small items creates intense visual chaos. The eye cannot rest anywhere when looking at dozens of tiny pieces. This scattered approach creates incredibly cheap looking home decor.
Nadia learned that nearly 39 percent of homeowners exceed renovation budgets by buying too many small items. The cost of endless tiny accessories adds up incredibly fast. She gathered all her small trinkets into a box.
She realized she needed to toss three specific categories of clutter immediately:
Visual Noise
Items to Edit Out by The Plan Decor
Tiny Picture Frames
Scattered across tabletops, these miniature frames create immediate visual clutter. Opt for a curated, larger-scale gallery wall instead.
Miniature Fake Succulents
Cluttering open shelves with tiny faux greenery dilutes the design. Replace them with one substantial, high-quality botanical arrangement.
Random Tealight Holders
Collecting dust on mantles and side tables. Edit these out to allow your surfaces to breathe and showcase true statement pieces.
Removing these three things cleared the visual noise from her living room. She decided to group her remaining decorative items in odd numbers instead. Arrangements of three or five items look far more natural and appealing.
She focused completely on styling shelves with pure intention. She swapped the tiny pieces for a few large statement items. A massive ceramic vase makes a much stronger impact than five tiny ones.
Using fewer, much larger pieces creates a calm, high end look. Nadia also realized that one large art piece beats a cheap gallery wall. She hung a single oversized canvas above her sofa.
The large scale art made the entire room feel bold and grounded. She stopped painting her walls flat gray to support this bold look. Spikes in color drenched rooms indicate a massive shift in interior design.
Pinterest trends for 2026 show massive search volume growth for textured walls. People want deep, tactile finishes instead of sterile surfaces. Nadia embraced this by keeping her decor large and minimal.
Her shelves now featured thick books, a large bowl, and a trailing pothos plant. The room finally felt like a designer space. She achieved this simply by removing the chaotic small distractions.
Nadia finally created a space she loved without expanding her original budget. By fixing the scale of her rug, she grounded the entire room perfectly.
Layering her lighting removed harsh shadows and added instant warmth. Pulling her furniture away from the walls created a cozy, inviting layout.
These simple adjustments proved to her that a beautiful home relies on proportion, not price tags. Anyone can completely transform a room in one afternoon without buying new things.
Nadia recommends standing up right now and pulling the couch two inches off the wall. This tiny shift is the first step to fixing why my home looks cheap.

