
Claire wanted beautiful DIY designer furniture dupes after seeing a perfect boucle accent chair online. Then she saw the $3,000 price tag. That amount cost more than her monthly rent.
The staggering price meant she would have to stare at an empty living room corner for another year. She refused to accept an unfinished space.
Instead, she learned exactly how to recreate expensive luxury pieces using cheap materials and simple techniques. Here is her complete process for building beautiful pieces without going broke.
The DIY Dupe Roulette
Spin the wheel to find a random thrift store item and learn exactly how Claire turns it into a high-end designer dupe!
Spin the wheel to see what you
found at the thrift store today!
Ugly Floral Chair
Ignore the terrible fabric and check the frame! Remove the old fabric with pliers and reuse the foam. Cover it in a heavy, textured $25 blanket using a heavy-duty staple gun.
Find Your Inspiration Piece Before Shopping
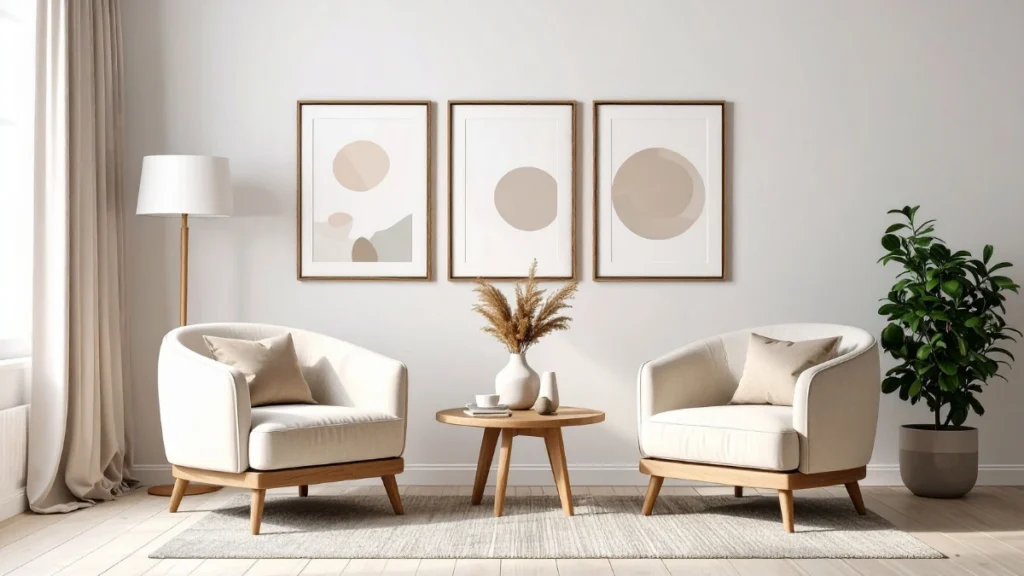
Claire started her project by identifying exactly what she wanted to copy. She saved a photo of a stunning modern armchair to her phone. The inspiration piece featured bright white boucle fabric and thick wooden legs.
Breaking down the complex design into basic components felt absolutely crucial. She realized the expensive chair was just a simple wooden frame covered in textured fabric. This realization made the entire project feel entirely possible.
She created a strict shopping list based on those exact materials. She needed a sturdy wooden frame and incredibly thick upholstery fabric. Staying focused on specific shapes prevented her from buying random junk.
During her initial research, Claire discovered a very interesting fact. The global secondhand furniture market hit $47,000,000,000 in 2025 according to Mordor Intelligence. This meant millions of other people were also hunting for used furniture bases.
She knew she had to shop strategically to beat the intense competition. She studied the silhouette of her dream chair for three full days. The luxury look relied entirely on curved arms and a very low seat height.
She ignored the ugly colors of older furniture pieces sold online. She trained her eyes to only look at the structural wooden bones. Recognizing a good shape is the true secret to a great transformation.
She noticed the inspiration piece used a very specific weaving pattern. The tight weave gave the chair a highly structured and firm appearance. She wrote down detailed notes about the fabric weight and color tones.
Claire read an interview with interior designer Nate Berkus during this planning phase. He explained that vintage silhouettes bring unmatched character to modern residential spaces. Claire took this professional advice to heart.
She decided her base piece needed a truly classic shape. Modern budget furniture often lacks the solid construction of older antique pieces. Vintage frames provide a much better foundation for drastic makeovers.
Claire wrote down the exact measurements of her empty living space. Buying a beautiful frame that does not fit is a costly mistake. She measured her living room corner three different times.
She also measured the strict width of her front apartment door. A massive chair would never fit through her narrow apartment hallway. These strict measurements formed the firm boundaries of her entire project.
Armed with her list and dimensions, she felt completely ready to shop. Finding the right base piece takes extreme patience and a very good eye. She prepared herself for a long weekend of intense hunting.
Source Cheap Designer Furniture Alternatives at Local Stores
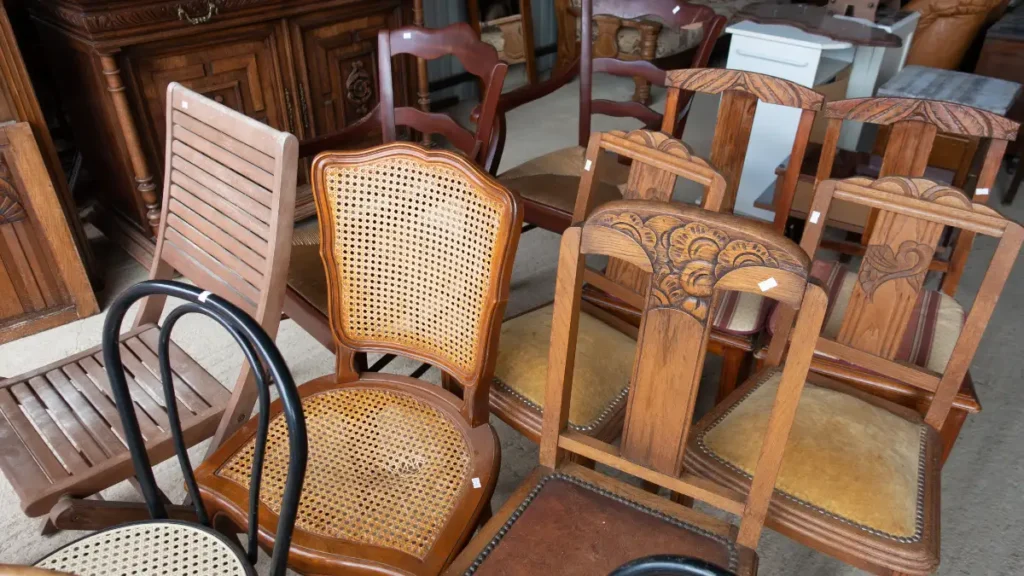
Claire discovered that thrift stores hide incredible treasures for very patient shoppers. She asked local shop employees when they restock their heavy furniture floors. Most stores put out fresh donations on Tuesday mornings.
She made Tuesday her dedicated weekly shopping day. Arriving early gave her the absolute first pick of all fresh arrivals. She walked straight to the back of the store immediately upon entering.
Finding cheap designer furniture alternatives requires looking past terrible fabric choices. Claire saw dozens of chairs covered in ugly floral patterns. She ignored the ugly patterns and focused entirely on the wooden frames underneath.
She found a chair with the exact perfect curved arms. She immediately tested its structural integrity by aggressively shaking the tall backrest. A wobbly frame always means expensive repairs down the road.
This particular wooden frame felt incredibly solid and unusually heavy. The heavy weight indicated real hardwood construction instead of cheap particleboard. She flipped the chair upside down to inspect the four legs.
The bottom showed secure wooden joints and very clean wood. Claire knew she had finally found her perfect base piece. The store wanted $45 for the vintage chair.
She remembered reading the eBay 2025 Recommerce Report. The report proved saving money remains the top reason people buy preloved goods. She decided to negotiate the price to save even more cash.
She politely pointed out a massive tear in the existing fabric. The store manager agreed to lower the final price to $30. Claire gladly paid the cash and loaded the chair into her car.
She also visited local estate sales on quiet Sunday afternoons. Families often discount heavy furniture drastically on the final day of a sale. Claire used this timing strategy to find incredible hidden deals.
She learned how to identify dovetail joints in older wooden drawers. Dovetail joints indicate high quality craftsmanship from older manufacturing eras. She completely avoided modern furniture held together with cheap metal staples.
When inspecting chairs, she pressed extremely hard on the seat springs. Broken metal springs require expensive professional repairs that destroy a tight budget. She only purchased items with completely intact webbing and solid metal supports.
| Material Type | Luxury Retail Price | Claire Cost | Total Savings |
| Solid Marble Slab | $800 | $25 | $775 |
| Boucle Fabric Yardage | $120 | $35 | $85 |
| Solid Oak Dresser | $1,500 | $40 | $1,460 |
| Brass Cabinet Pulls | $150 | $25 | $125 |
| Ceramic Textured Vase | $250 | $5 | $245 |
This simple table proved exactly how much money she could save. She kept this chart on her phone to stay highly motivated. Now she needed to gather her specific finishing supplies.
Master the Art of Faux Ceramic Texture
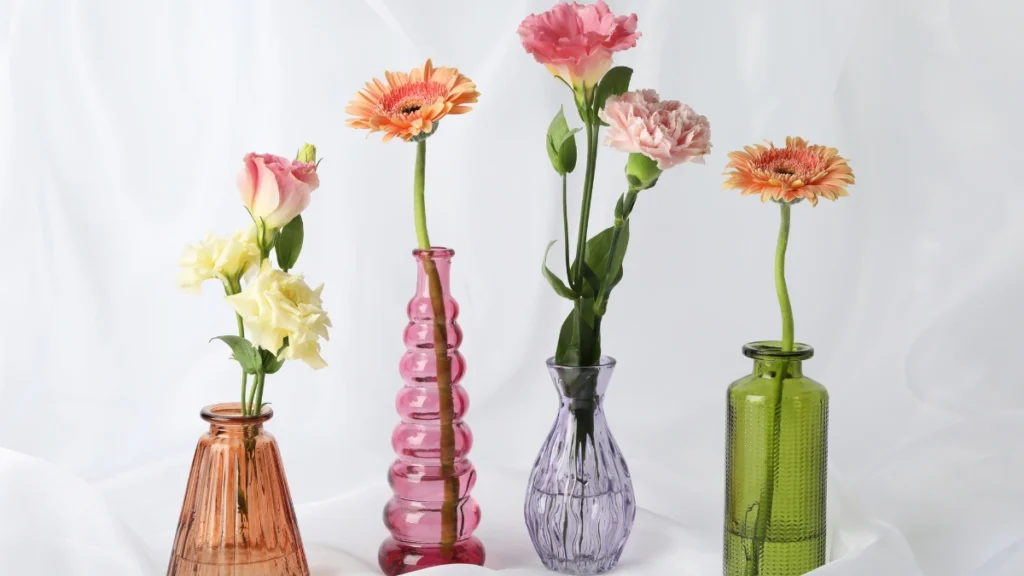
Paint solves almost every single aesthetic problem in a home. Claire wanted a high end textured vase to place near her new chair. Authentic ceramic vases often cost hundreds of dollars at retail stores.
She decided to make her own using a cheap glass vase. She bought a basic glass cylinder from a local dollar store for $3. Then she mixed ordinary baking soda with leftover white wall paint.
The perfect mixture requires one part baking soda to two parts paint. Claire mixed the dry ingredients in an old plastic container using a wooden stick. The mixture quickly bubbled into a very thick paste.
Adding baking soda creates a thick and highly gritty texture. She brushed the thick mixture onto the smooth glass surface. The wet paint dried into a beautiful faux ceramic finish.
Pinterest Trends data showed searches for handmade wall design and texture paint spiked in early 2026. Claire understood exactly why this specific trend became so incredibly popular. The textured finish looked incredibly expensive and highly organic.
She applied a heavy second coat of the baking soda mixture. Building thick layers created a much more realistic clay appearance. She let the final coat dry completely overnight.
She applied the paste using a very cheap bristle brush. Using an expensive synthetic brush would leave unwanted smooth strokes. The cheap bristles created deep grooves that mimicked handmade pottery perfectly.
She waited exactly four hours between each coat of textured paint. Rushing the delicate drying process causes the heavy mixture to slide down the glass. Extreme patience proved vital for achieving a realistic clay appearance.
Textured Transformations
Faux Finishes by Hazel Quinn | The Plan Decor
The Drying Process
She waited exactly four hours between each coat of textured paint. Rushing the delicate drying process causes the heavy mixture to slide down the glass.
Realistic Texture
Building thin layers repeatedly requires discipline. Extreme patience proved vital for achieving a beautifully realistic clay appearance on a basic surface.
Matte Sealant
The next morning she sealed the vase with a matte clear spray. Sealing the dry paint prevents unwanted chipping and ensures the finish lasts for many years.
The Walnut Illusion
Claire applied dark gel stain over a cheap laminate side table. This clever trick faked the look of rich, expensive walnut wood perfectly.
The next morning she sealed the vase with a matte clear spray. Sealing the dry paint prevents unwanted chipping when handling the piece. This very small step ensures the finish lasts for many years.
Claire also used clever paint tricks on other surfaces. She applied dark gel stain over a cheap laminate side table. The dark gel stain faked the look of rich walnut wood perfectly.
She remembered a great piece of advice from designer Kelly Wearstler. Wearstler stated that mixing unexpected textures creates true luxury in a room. Claire confidently combined her gritty vase with the sleek wood table.
She also bought a can of Rustoleum matte gold spray paint for $8. She heavily sprayed the metal legs of her cheap side table. The matte gold instantly elevated the cheap metal base.
When spraying the metal table legs, she held the can ten inches away. Spraying too closely causes terrible drip marks on smooth metal. She applied three very light coats instead of one heavy coat.
Reupholster Like a Professional on a Luxury Home Decor Budget
Fabric work intimidates many beginners taking on major room updates. Claire felt absolutely terrified of ruining her beautiful thrifted frame. She reassured herself that stapling fabric is just basic geometry.
Before applying her new fabric, she had to remove the old material. She used heavy flathead pliers to pull out hundreds of rusty staples. This tedious process took three full hours of intense hand labor.
Removing the old fabric revealed the original foam padding underneath. The foam still felt incredibly firm and completely free of strange odors. Reusing the original foam saved her another fifty dollars.
She started by hunting for discounted fabric remnants at a local craft store. Buying full yardage of real boucle fabric costs an absolute fortune. Instead, she found a heavy textured blanket for $25.
The thick blanket possessed the exact bumpy texture she wanted. Using non traditional materials is a brilliant way to stick to a luxury home decor budget. She washed the heavy blanket twice to soften the stiff fibers.
Claire read an interesting financial projection during her upholstery research. Ikea expects the global secondhand furniture market to grow seven percent annually through 2030. People clearly want to fix old items instead of throwing them away.
She bought a professional heavy duty staple gun for $18. A standard office stapler will never penetrate solid hardwood frames. She also bought a massive box of heavy duty steel staples.
She draped her washed blanket over the bare chair seat carefully. She made sure the fabric grain ran perfectly straight across the foam cushion. Crooked fabric lines instantly reveal a bad amateur upholstery job.
Pulling the thick fabric extremely tight around the sharp corners is essential. Loose fabric makes a lovely chair look cheap and highly messy. She held the tension firmly with one hand while firing the staple gun.
She stapled the fabric directly to the underside of the wooden frame. She worked strategically from the center of the seat outward toward the edges. This specific method prevents ugly wrinkles from forming in the middle.
Folding the heavy fabric around the sharp corners took immense practice. She folded the corners like a tight hospital bed sheet to keep them crisp. She drove a steel staple into every fold to secure it.
Claire used a hot glue gun to attach a thin decorative trim. The trim perfectly covered the raw fabric edges and shiny steel staples. Hiding the metal staples makes the finished work look completely professional.
Upgrade Cabinet Hardware for an Instant Lift
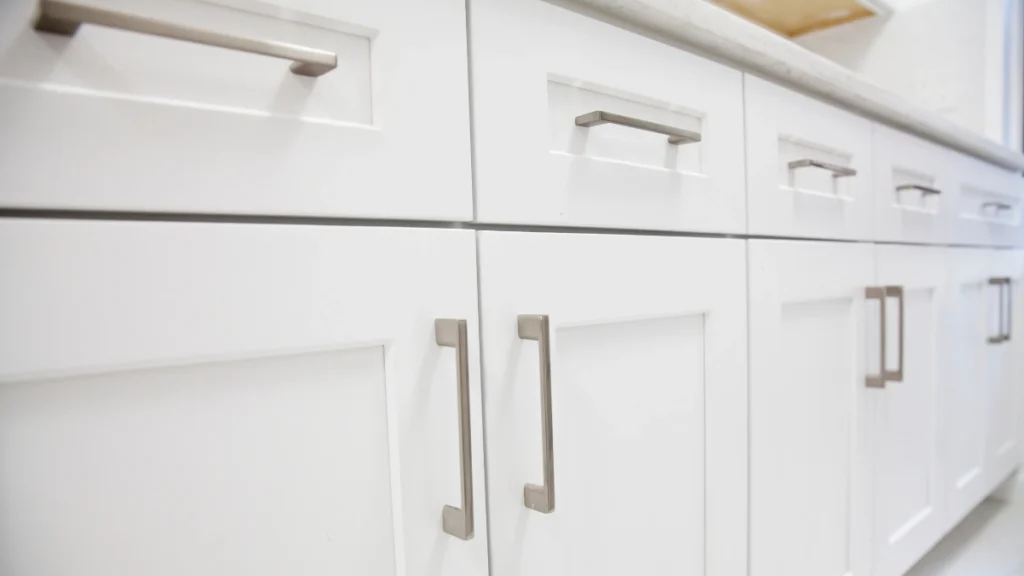
Claire firmly knew that hardware acts like beautiful jewelry for furniture. She owned a basic wooden dresser that looked incredibly boring. The piece featured cheap plastic knobs that dragged down the entire room.
She removed the ugly plastic knobs with a simple flathead screwdriver. Replacing old hardware yields the highest visual impact per dollar spent according to Apartment Therapy. Claire completely agreed with this exact statistic.
Flawless Wood Repair
Restoration Basics by Hazel Quinn | The Plan Decor
Application
She used a plastic putty knife to gently but firmly push the filler deep into the excavated holes, ensuring no air pockets remained.
The Mound Technique
She left the soft filler slightly mounded above the flat wood surface. The extra height allowed for necessary shrinkage as the cheap wood filler dried completely.
Curing Time
Patience is critical. After twenty four hours, the mounded filler had completely hardened and fully shrunk into the cavity.
Precision Sanding
She sanded the dry mounds completely flat. She intentionally used fine grit sandpaper to gently level the filler and avoid scratching the surrounding wood.
The Touch Test
The visual look isn’t enough. Running her bare hand over the surface revealed a perfectly smooth finish, completely flush with the original wood.
She used a plastic putty knife to push filler into the deep holes. She left the soft filler slightly mounded above the flat wood surface. The mound allowed for shrinkage as the cheap wood filler dried completely.
After twenty four hours she sanded the dry mounds completely flat. She used fine grit sandpaper to avoid scratching the surrounding wood. Running her bare hand over the surface revealed a perfectly smooth finish.
She then painted the entire wooden dresser a deep charcoal color. Choosing the correct paint finish for furniture is crucial for extreme durability. Claire used a specific finish chart to make her final painting decisions.
| Finish Type | Best Furniture Application | Durability Level |
| Flat Matte | Decorative mirrors and frames | Low Protection |
| Eggshell | Low traffic side tables | Medium Protection |
| Satin Finish | Dressers and coffee tables | High Protection |
| High Gloss | Heavy use dining tables | Maximum Protection |
She chose a durable satin finish for her major dresser makeover. After the dark paint dried she needed to attach her new hardware. She bought a pack of Amazon basics brass cabinet pulls for $35.
Buying heavy hardware in bulk online saves massive amounts of money. Individual brass pulls at hardware stores often cost $10–$25 each. Claire carefully marked the precise placement for her new modern handles.
Choosing the right drill bit size permanently prevents wood from splitting. Claire selected a sharp bit slightly smaller than her new brass screws. She placed a small strip of masking tape over the drilling spots.
Drilling straight through the masking tape prevented the fresh charcoal paint from chipping. She held the heavy drill perfectly level to ensure incredibly straight handles. Crooked cabinet pulls ruin the appearance of a premium dresser.
The heavy solid brass pulls screwed perfectly into the newly drilled holes. The deep charcoal paint made the gold metal shine beautifully. Her basic wooden dresser now looked like a premium designer piece.
She also rubbed some Rub N Buff metallic wax on the corners for extra shine. Her heavily upgraded furniture pieces were finally complete. Now she just needed to arrange everything properly in her apartment.
Style the Final High End Room Makeover Properly
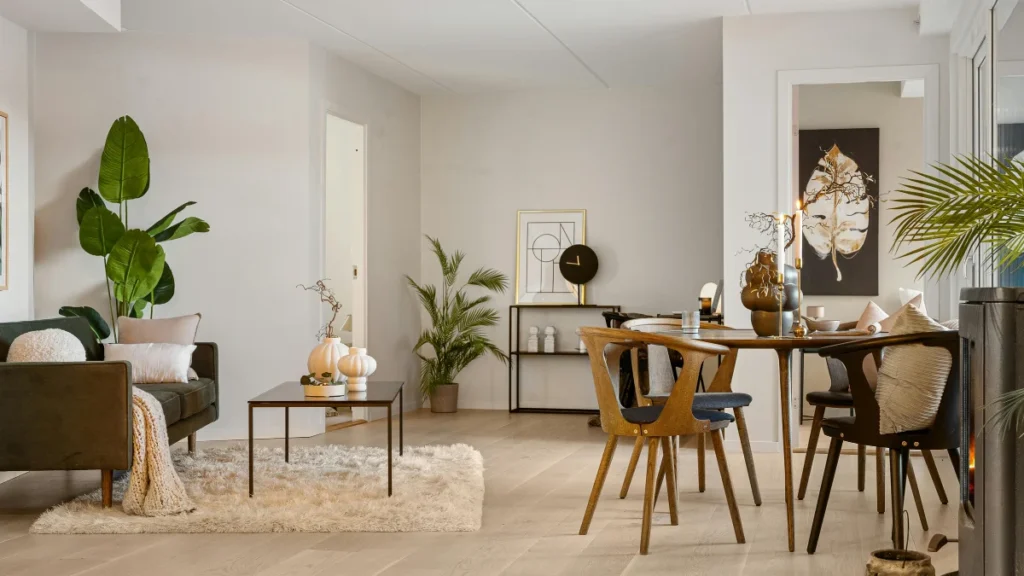
Claire quickly realized that even a great piece looks bad in poor lighting. She placed her newly upholstered chair in the corner of her living room. Pushing the chair tightly against the flat wall made it look cramped.
She pulled the heavy chair a few inches away from the wall. Giving furniture pieces breathing room makes a space feel larger and more intentional. This incredibly small adjustment completely changed the entire room dynamics.
She bought a small vintage rug for $45 online. The beautiful rug measured exactly five feet by seven feet. This specific size anchored the chair without overwhelming her small living room corner.
She placed the front legs of the heavy chair onto the rug. Leaving the back legs on the bare wooden floor created a lovely layered effect. Layering textures is entirely essential for a highly successful high end room makeover.
Next she focused on adding her tall green snake plant. Snake plants survive perfectly in dark corners with minimal natural sunlight. The dark green leaves contrasted beautifully against the bright white boucle fabric.
She placed the green plant inside her newly textured baking soda vase. Fresh greenery brings immense life and vibrant color to neutral furniture spaces. This natural element made the space feel incredibly wealthy and grounded.
Lighting became her final and absolutely most important styling step. Houzz reports that lighting updates remain a top priority for sixty five percent of living room remodels. Overhead ceiling lights cast harsh shadows on beautiful furniture.
Claire turned off her bright overhead ceiling light completely. She placed a small brass floor lamp directly behind her new chair. She installed a warm toned LED bulb in the brass lamp fixture.
She installed a soft white bulb measuring twenty seven hundred kelvins. This exact bulb temperature mimics the highly flattering glow of candlelight. Harsh blue bulbs make even the absolute most expensive furniture look completely sterile.
The warm golden light highlighted the thick texture of her boucle fabric. The brass hardware on her nearby dresser glowed beautifully in the soft shadows. Her styling DIY furniture process was officially and completely finished.
She sat in her beautiful new chair and looked around her room. She had created a stunning aesthetic without draining her small savings account. She proved that beautiful homes absolutely do not require massive budgets.
The DIY Transformation
Budget Luxury by Hazel Quinn | The Plan Decor
The Thrifted Foundation
Claire proved that finding solid base pieces at thrift stores provides the absolute perfect foundation for a massive spatial transformation.
Clever Faux Finishes
Applying clever faux finishes and fresh paint completely elevated her basic, dated items into beautiful, high-end luxury goods.
Hardware Upgrades
Upgrading cheap hardware with sophisticated metal pulls was the ultimate finishing touch that disguised the furniture’s humble origins.
Sweat Equity
She saved thousands of dollars by doing the physical work entirely herself, proving a small budget absolutely cannot stop great design.
The Designer Showcase
Through extreme patience and boundless creativity, Claire’s apartment finally feels like a carefully curated designer showcase.
Claire completely transformed her living space through extreme patience and creativity. She proved that finding solid base pieces at thrift stores provides the absolute perfect foundation.
Applying clever faux finishes and upgrading cheap hardware elevated those basic items into beautiful luxury goods. She saved thousands of dollars by doing the physical work entirely herself.
She proved that a small budget absolutely cannot stop great design. Her apartment finally feels like a curated designer showcase.
Claire advises everyone to grab a tape measure and visit a local thrift store this weekend. Readers should share what they discover in the comments below. Making stunning DIY designer furniture dupes is entirely possible.

