
You just spent an hour hanging a gorgeous gallery wall. Every time someone walks down the hallway, those frames shift slightly. Crooked artwork and wobbly vases make your carefully planned space look messy and chaotic.
You will discover the exact $8 product professional interior stylists rely on to keep homes looking flawless. Once you learn these museum wax uses, you will never look at your decor the same way.
A tiny amount solves your biggest styling headaches permanently. It works on almost any surface without causing damage.
The Decor Stabilizer Console
Click on a wobbly or crooked item below to lock it into place and reveal the exact museum-grade fix.
Select a wobbly item from the list
to generate the styling solution.
Crooked Gallery Wall
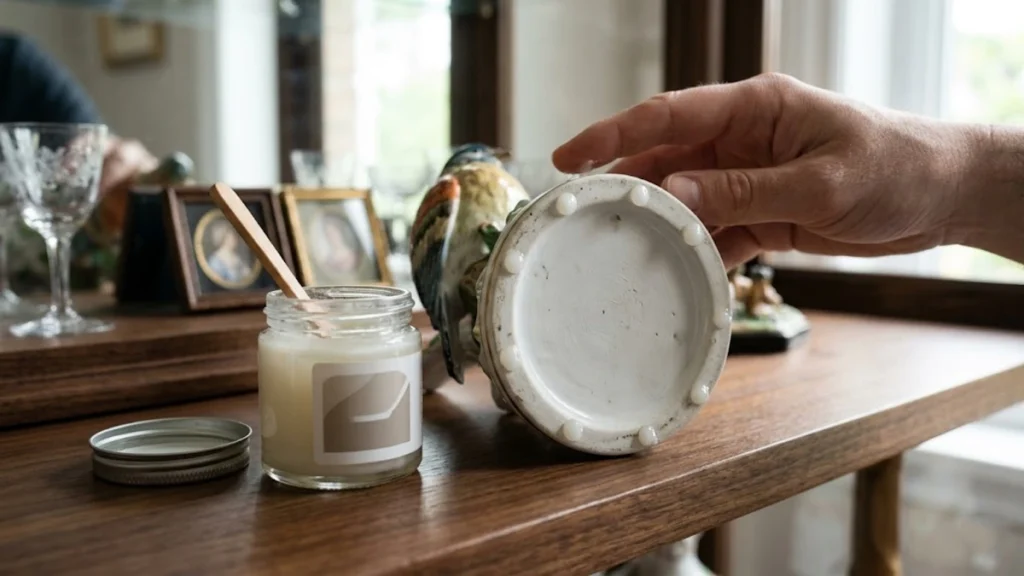
Take a tiny bead of wax and place it on the bottom two corners of your picture frame. Press firmly against the wall and use a level to get it perfectly straight.
Never pull straight off! Grasp the frame firmly and twist slowly clockwise to shear the wax bond without peeling the paint.
What Is Museum Wax?
The name sounds like something reserved for dusty historical archives. This product was literally invented to save priceless artifacts during major earthquakes.
Museum conservators needed a reliable way to secure heavy statues and fragile glass. They created a microcrystalline blend that grips tightly but releases cleanly.
Now, decorators use it as one of their favorite professional styling tools. A standard two ounce jar of Quakehold! Museum Wax costs about $8 and lasts for years. You only need a pea sized amount for most projects.
The material never dries out completely. You can reuse the same small piece multiple times. This makes it an incredibly cost effective way to protect your investments.
The National Association of Home Builders notes that minor interior updates account for 45 percent of minor remodeling projects. Those small details matter immensely when finishing a room. You want your fresh updates to look polished and intentional.
This wax is completely safe for sealed wood, glass, and drywall surfaces. You simply roll a tiny piece between your fingers until it softens. Press it onto the bottom of your object and push down firmly.
Gallery curator Sarah Jenkins explains why she never works without it. “Keeping artwork level is crucial for visual harmony in a room,” she says. “A millimeter of tilt ruins the entire presentation of an expensive piece.”
Now that you know what it is, look at how it solves your biggest living room annoyances. Let us fix that crooked gallery wall first.
Living Room Hacks: Fixing Crooked Art and Wobbly Vases

You finally finish arranging the perfect living room. Then you close the front door and hear your picture frames rattle against the drywall. You spend the rest of the week straightening them every time you walk by.
A Houzz design survey shows 64 percent of people prioritize displaying framed photos in their living spaces. But keeping them perfectly straight feels like a full time job. That changes when you start applying this clever trick.
Take a small bead of wax and place it on the bottom two corners of your picture frame. Press the frame firmly against the wall and use a level to get it perfectly straight.
The wax grips the drywall securely and holds the frame in place forever. It works equally well on plaster walls or wood paneling. You never have to worry about the paint peeling.
This trick also saves you serious money. Apartment Therapy reports that the average cost to reframe custom art reaches $250 in 2024. If a loose frame falls and shatters, you face a hefty replacement bill.
You can also use this to secure tall taper candles into oversized holders. Just place a dot inside the cup and press the candle down. It stays perfectly straight and will not wobble when you light it.
If you have cats, you know they love knocking over decorative bowls. A tiny amount under your coffee table styling accessories keeps them perfectly safe. You can even use it to keep coffee table books stacked neatly together.
Your walls are perfect now. Let us move into the kitchen.
Kitchen Shelving: Securing Glassware Safely
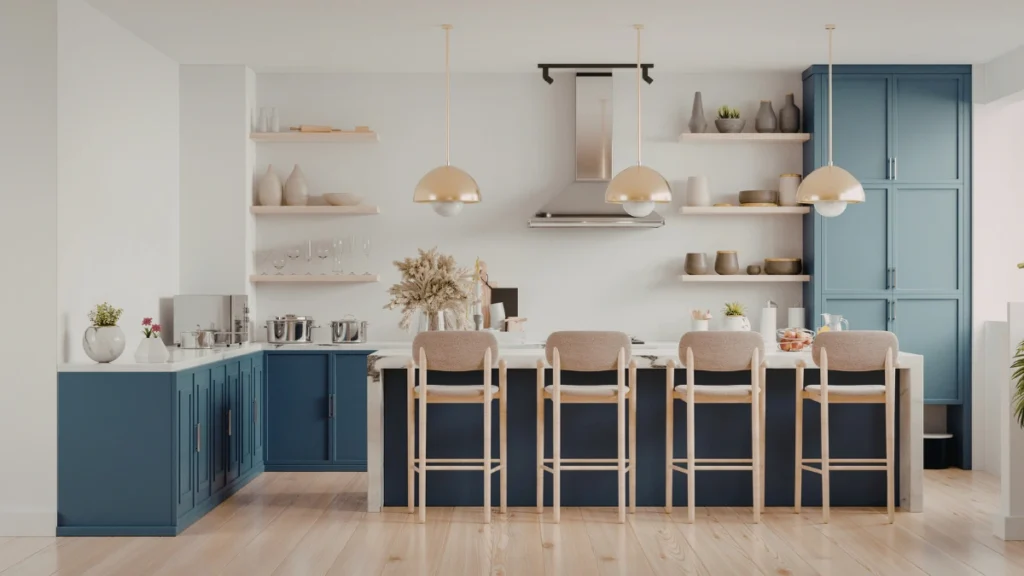
Open kitchen shelving looks beautiful and makes your space feel airy. But practical risks exist when you store fragile items out in the open. Vibrations from heavy walking or slamming doors make glasses creep forward over time.
Pinterest Trends reports a 45 percent increase in searches for open kitchen shelving styling. People love the look but struggle with the daily upkeep. You need a way to keep your delicate items safe from accidental bumps.
Interior designer Emily Henderson relies heavily on this exact solution for her clients. “Styling shelves securely requires more than just good placement,” she says. “You have to anchor the fragile pieces so they survive daily kitchen activity.”
This is where museum gel for collectibles becomes incredibly useful. You can apply a tiny dot to the bottom of fragile stemware. Press the glass gently onto the wood.
It holds delicate wine glasses firmly in place on wooden or painted shelves. You can confidently store your favorite glassware in high traffic areas.
You can also secure decorative pitchers or heavy ceramic bowls on high displays. The wax ensures they will not inch toward the edge when the refrigerator door slams. It provides total peace of mind for your most expensive kitchen items.
This trick also makes cleaning much easier. You can wipe around your secured items without knocking them over. Dusting becomes a fast process instead of a delicate balancing act.
The kitchen is safe. Next, we will secure the slickest room in the house.
Bathroom Counters: Anchoring Trays and Apothecary Jars
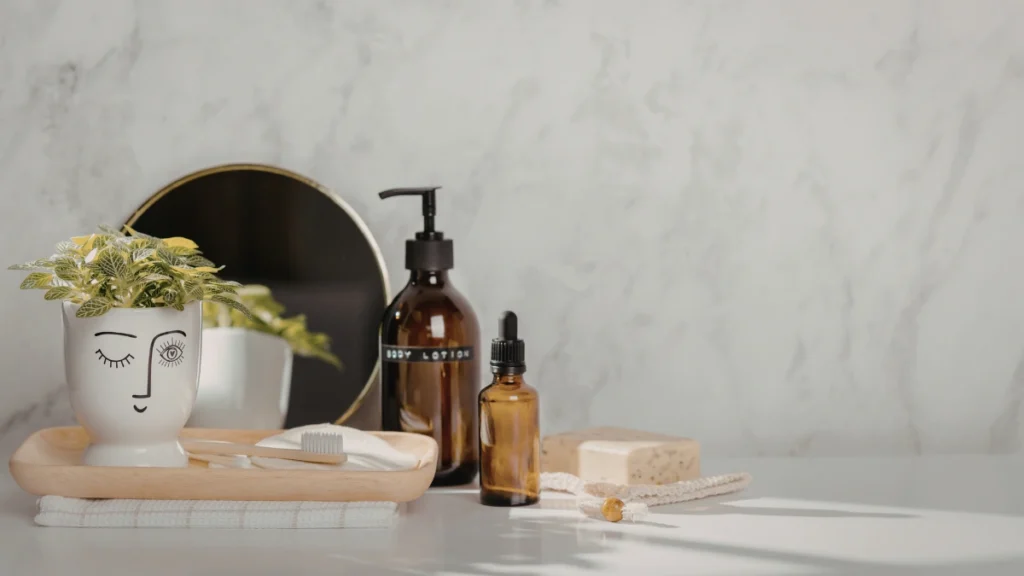
Picture a heavy glass jar sliding off a wet marble vanity and shattering into the sink. Hard vanity surfaces are incredibly slippery when water gets involved. One careless sweep of a towel can send your favorite perfume bottle flying.
According to Houzz, bathroom remodeling budgets increased by 13 percent last year. People are investing heavily in beautiful quartz and marble countertops. You want to protect those new vanity surfaces from scratches and heavy impacts.
Organizing bathroom counters becomes much safer when you anchor your storage containers. You can apply a small amount to the bottom of a vanity tray. Press the tray down onto the marble. The tray stays firmly planted exactly where you want it.
This product is highly moisture resistant and holds up well in humid bathrooms. Steam from your shower will not break the adhesive bond. You can confidently secure all your daily essentials near the sink.
Here are the most common bathroom items you should anchor immediately:
Vanity Curation
Bathroom Styling by Hazel Quinn | The Plan Decor
Apothecary Storage
Glass apothecary jars holding cotton swabs keep everyday essentials beautifully visible, elevating basic daily necessities into spa-like decor.
Perfume Display
Heavy perfume bottles on display trays act as functional art, bouncing light around the vanity and anchoring the space with a touch of luxury.
Sink Side Ceramics
Ceramic toothbrush holders near the sink provide a durable, easy-to-clean base that adds subtle artisanal texture to hard marble or quartz countertops.
Tank Styling
Small decorative vases on the toilet tank offer the perfect opportunity to introduce delicate greenery and soften the room’s most utilitarian corner.
Styling trays look incredibly polished when every item stays exactly in its designated spot. You never have to reorganize the counter after a rushed morning routine.
You protected the bathroom. Finally, let us secure your sleeping space.
Bedroom Nightstands: Styling That Stays Put
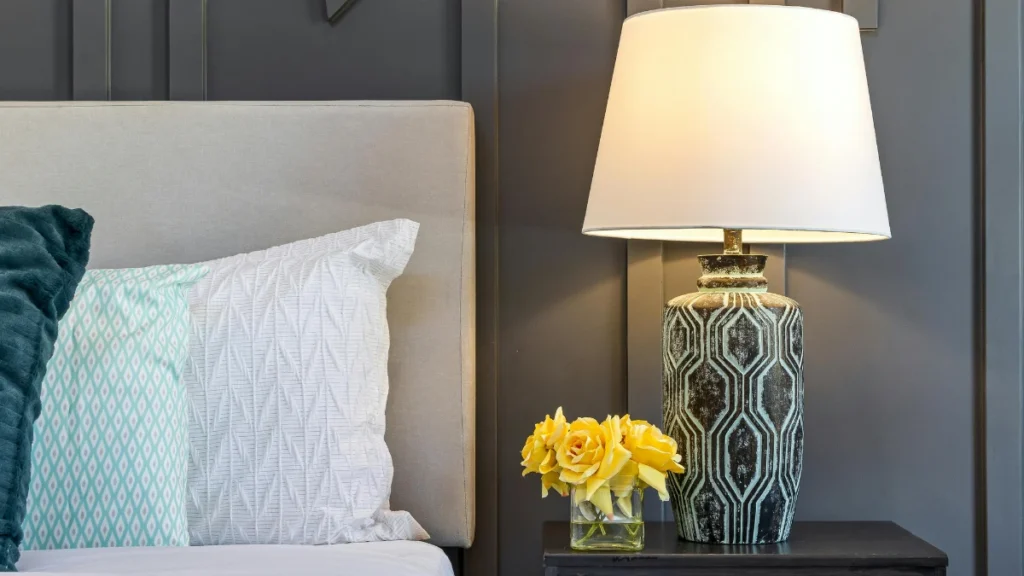
You wake up at two in the morning and reach for the lamp switch. Your fumbling hands knock the entire metal lamp across your wooden nightstand. A loud crash wakes the whole house and leaves a deep scratch on your furniture.
The Sleep Foundation states that 70 percent of people consider a clutter free bedroom crucial. A well styled bedroom promotes deep sleep and morning relaxation. But bedside table decor must be practical enough to survive the night.
Nightstand styling requires a delicate balance between beauty and function. You need your water carafe and reading glasses within easy reach. But you also want a decorative ring dish or a small framed photo on display.
Apply three small dots of wax to the bottom of your bedside lamp. It will stay firmly rooted to the table when you reach for the switch blindly. You can also anchor your water carafe so you never spill it in the dark.
A decorative ring dish becomes much safer when it cannot slide off the edge. You can toss your jewelry into it without watching the bowl scoot backward.
Here is a quick reference guide for securing items throughout your home.
| Room | Decor Item | Recommended Amount |
| Living Room | Picture Frames | Two tiny dots on bottom corners |
| Living Room | Taper Candles | Thin ring inside the candle holder |
| Kitchen | Wine Glasses | One small bead on the base |
| Bathroom | Vanity Trays | Four small dots on the bottom corners |
| Bedroom | Table Lamps | Three pea sized balls on the base |
You styled the whole house securely. Now you need to know how to undo it safely.
How to Remove Museum Wax Without Damaging Furniture

You might feel nervous about sticking an adhesive product to your expensive antique dressers. Temporary truly means temporary when you use the correct removal technique. You can easily lift items that have been stuck in place for five years.
Furniture restoration costs average $150 to $300 per piece according to HomeAdvisor. This highlights the importance of using safe removal techniques to protect wood furniture. Never pull an item straight up from the surface.
Pulling straight up creates a vacuum seal that can lift delicate wood veneer. It can also cause thin glass stems to snap in your hand. Instead, you must use a gentle twisting motion to break the bond. This shears the wax safely without pulling on the table finish.
Follow these exact steps to remove museum wax safely:
Safe Detachment
Hardware Removal by Hazel Quinn | The Plan Decor
Secure Hold
Grasp the base of the secured object firmly with both hands. Establishing a solid, even grip prevents accidental slipping that could damage the surrounding surface.
Controlled Rotation
Twist the object slowly in a clockwise direction. Apply steady, consistent pressure rather than jerking it, allowing the internal threads or adhesive to yield naturally.
Feel the Release
Keep twisting gently until you feel the grip release completely. You will notice a distinct drop in resistance once the hardware is fully unseated.
Clear the Surface
Lift the item safely away from the surface. Pull it straight back to avoid dragging sharp edges or exposed screws across your delicate finishes.
You will likely see a small residue left behind on your table. Simply roll a spare ball of the product over the residue to pick it up. You can wipe away any final traces with a soft microfiber cloth.
Never use sharp tools or harsh chemical cleaners to scrape the surface. The twisting method works perfectly every single time.
You know how to apply and remove it. Are there other options?
Product Showdown: Museum Wax vs Museum Gel vs Museum Putty

You will notice several different earthquake safety products sitting on the hardware store shelf. The choices usually come down to wax, gel, or putty. Each option serves a very specific purpose for your home decor.
Quakehold! Museum Wax costs about $8 and works best on wooden surfaces. It has an opaque yellowish tint that blends well against solid objects. You should choose this for wooden shelves, painted mantels, and drywall surfaces.
Ready America Museum Gel costs around $10 and is completely transparent. This makes it the perfect choice for securing glass objects to glass shelves. The clear gel remains invisible under crystal vases or thin wine glasses.
Museum putty is designed for much heavier ceramic or stone items. Seismic safety sites recommend putty for securing items up to forty pounds. Wax is best for lighter decorative items weighing under five pounds.
You might also see Renaissance Micro Crystalline Wax Polish for $25 nearby. This is a polishing product used to shine antiques and will not secure items.
Review the comparison chart below to choose the right product for your next project.
| Product Name | Best Surface Use | Transparency | Price |
| Museum Wax | Wood and Drywall | Opaque | $8 |
| Museum Gel | Glass and Crystal | Clear | $10 |
| Museum Putty | Heavy Stone and Ceramic | Solid White | $7 |
A tiny amount of this product goes an incredibly long way. It permanently prevents accidental breakage in high traffic areas of your home. Best of all, it keeps your art perfectly level without any daily adjustments.
Buy a jar today and spend fifteen minutes fixing the crooked frames in your hallway. Tell us in the comments which room you tackled first! Finding new museum wax uses will completely change how you style your home.

