
Finding the perfect ribbed wood living room credenza often comes with a $2,400 price tag that stops you cold. Settling for generic flat pack furniture leaves your space feeling cheap and completely unfinished.
You can build custom living room storage yourself instead. Creating expensive looking IKEA hacks takes one weekend but saves you thousands of dollars.
You will learn exactly how to transform a basic cabinet into a luxury anchor piece using wood trim, fresh paint, and modern hardware.
The Credenza Elevation Blueprint
Watch the flat-pack base transform. Toggle the steps below to track your exact costs versus high-end showroom prices.
Why the BESTA is Your Perfect Living Room Canvas
Start by defining why this specific frame beats other options on the market. The IKEA BESTA system features a modular design that fits perfectly into any space. You can connect multiple frames to create a massive media console or keep it small.
The low profile sits seamlessly beneath mounted televisions without crowding the room. This shallow depth makes it the ultimate choice for narrow living rooms that need walking clearance. You get maximum impact without sacrificing your floor plan.
Flat doors provide the perfect blank surface for attaching custom wood trim. There are no annoying bevels or shaker styles to sand down before you begin working. You simply buy the cheapest flat white doors and start gluing.
Hidden storage changes the way a room feels entirely. According to the Houzz Living Room Trends Study, 64 percent of homeowners prioritize hidden media storage during updates. The BESTA swallows routers, messy cables, and board games with ease.
Interior designer Sarah Sherman Samuel frequently uses this exact base for high end client projects. She notes that the modular sizing allows you to fake the look of built in cabinetry. You just need the right exterior materials to elevate the basic box.
A great frame needs the right textures to look truly custom.
Materials Needed for Your Fluted Sideboard
You need to know exactly what to put in your cart before hitting the hardware store. Creating expensive looking IKEA hacks requires specific materials that handle daily wear and tear. Your shopping list starts with the standard IKEA BESTA frame and SELSVIKEN flat doors.
The secret ingredient for a DIY fluted sideboard is pole wrap. Pole wrap is a flexible sheet of half round wood trim originally designed for basement columns. You can find it in the millwork aisle of most major hardware stores for around $60.
Texture is currently dominating interior design trends across the internet. Pinterest Trends data shows searches for fluted furniture increased by 135 percent year over year. Pole wrap gives you that trendy ribbed texture without cutting individual wood slats.
You will also need heavy duty wood glue to secure the wood to the laminate doors. Pick up four trigger clamps and a fine tooth saw for clean cuts. You absolutely need a can of Zinsser B-I-N Shellac Base Primer for about $25.
Do not forget to order custom legs from a specialty brand like Pretty Pegs. Their solid wood and brass legs cost around $45 and replace the cheap plastic defaults. Let your wood acclimate to your living room humidity for two days before cutting.
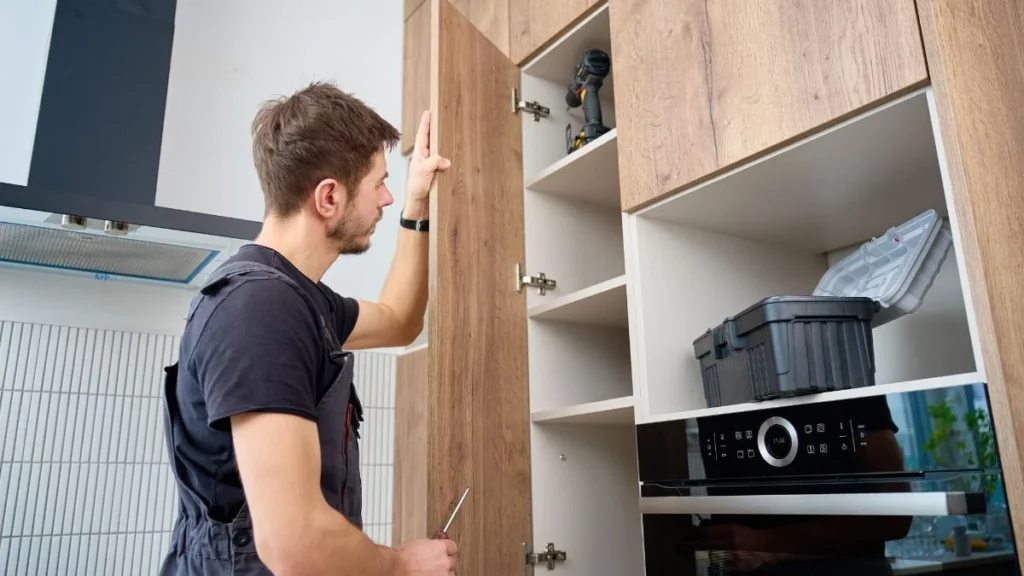
Moving from shopping to the physical assembly process takes some patience.
| Item or Brand | Cost | Assembly Type | Total Price |
| DIY BESTA Hack | $380 | Weekend Project | $380 |
| West Elm Ribbed Console | $1,699 | Pre Assembled | $1,699 |
| Crate & Barrel Sideboard | $2,499 | White Glove | $2,499 |
Attaching the Wood Trim to Your Cabinet Doors
Cutting wood sounds intimidating to beginners, but this process is actually quite simple. You must measure the exact height and width of your cabinet doors twice before cutting. Accuracy here ensures the fluted trim aligns perfectly across the entire custom living room storage unit.
Roll out your pole wrap flat on the floor with the wood side facing up. Use a fine tooth saw or an oscillating multi tool to make your cuts. A fine blade prevents the thin wood veneer from splintering along the edges.
Once the pieces are cut to size, apply a generous wave of wood glue. Spread the glue evenly across the entire surface of the flat laminate door. You want full coverage so the wood does not bubble or lift over time.
Press the trimmed pole wrap firmly onto the glued door surface. Make sure the edges are perfectly flush with the sides of the cabinet door. Clamp the wood tightly in place using trigger clamps and straight boards to distribute pressure evenly.
This next step requires absolute patience to ensure a permanent hold. Testing data from Wood Magazine confirms wood glue creates a bond stronger than the wood itself. However, that strength only develops when the piece is clamped properly for a full 24 hours.
Resist the temptation to remove the clamps early just to check your work. If you rush the drying process, the edges will peel away and ruin your IKEA BESTA hack. Let the glue cure fully overnight in a dry room.
Once the glue dries completely, the real transformation finally begins.
Sanding and Priming for a Factory Finish
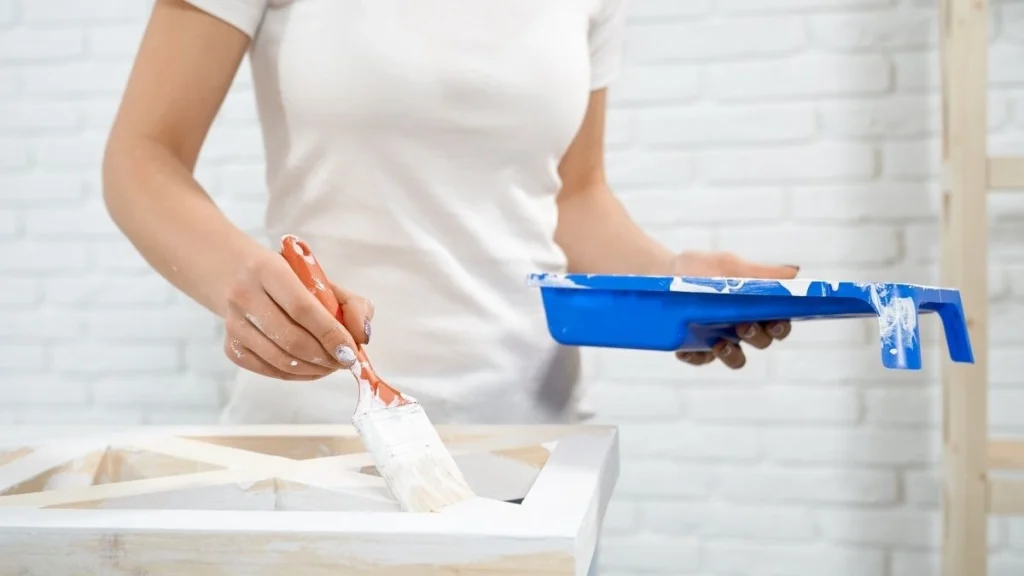
The biggest mistake DIYers make with IKEA furniture is skipping the preparation phase. Laminate is incredibly smooth and naturally repels most standard interior wall paints. You have to create microscopic scratches on the surface so the new paint can grip tightly.
According to Sherwin Williams product data, 80 percent of paint failures on laminate happen from improper prep. If you skip cleaning and priming, your paint will peel off in large strips. Start by scuff sanding the entire piece lightly to break the glossy factory seal.
You must use a shellac based primer for the absolute best adhesion. Water based primers simply bead up and slide off slick manufactured surfaces. Shellac primer bonds to anything and creates the perfect base layer for expensive looking IKEA hacks.
Apply the primer using a high density foam roller instead of a standard brush. A foam roller leaves a perfectly smooth finish without any visible brush strokes. You want your DIY fluted sideboard to look like it came straight from a factory.
Wait for the first coat of primer to dry completely before touching it. Lightly sand the primed surface to knock down any bumps or dust particles. Wipe away the dust with a tack cloth before applying your final paint color.
Taking your time during this messy prep work prevents annoying chipping later.
| Grit Number | Stage of Project | Purpose |
| 120 Grit | Scuffing Laminate | Breaks the glossy factory seal |
| 220 Grit | Smoothing Primer | Removes drips before painting |
| 320 Grit | Between Paint Coats | Creates a flawless smooth finish |
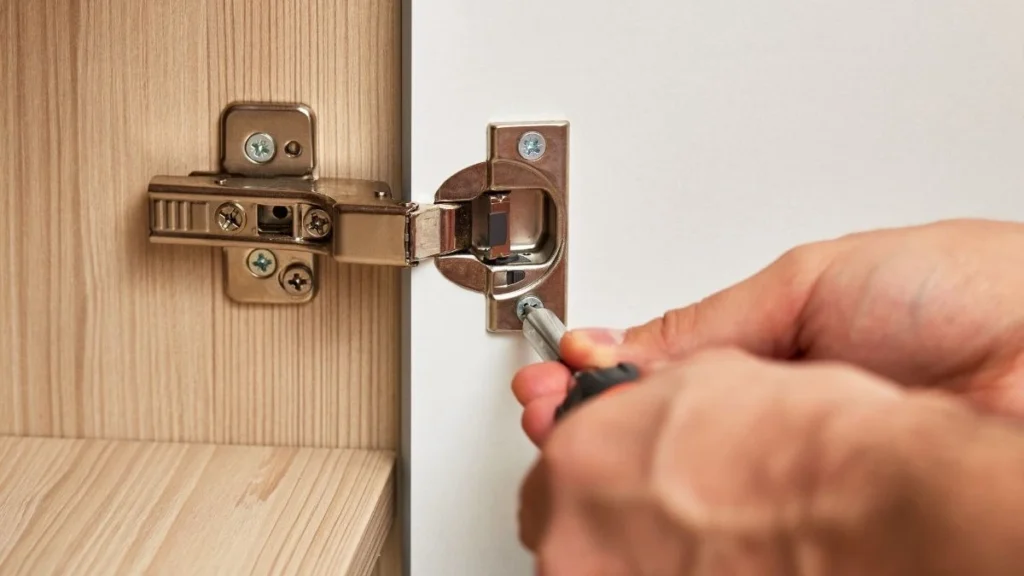
Elevating the Piece with Luxury Hardware and Legs
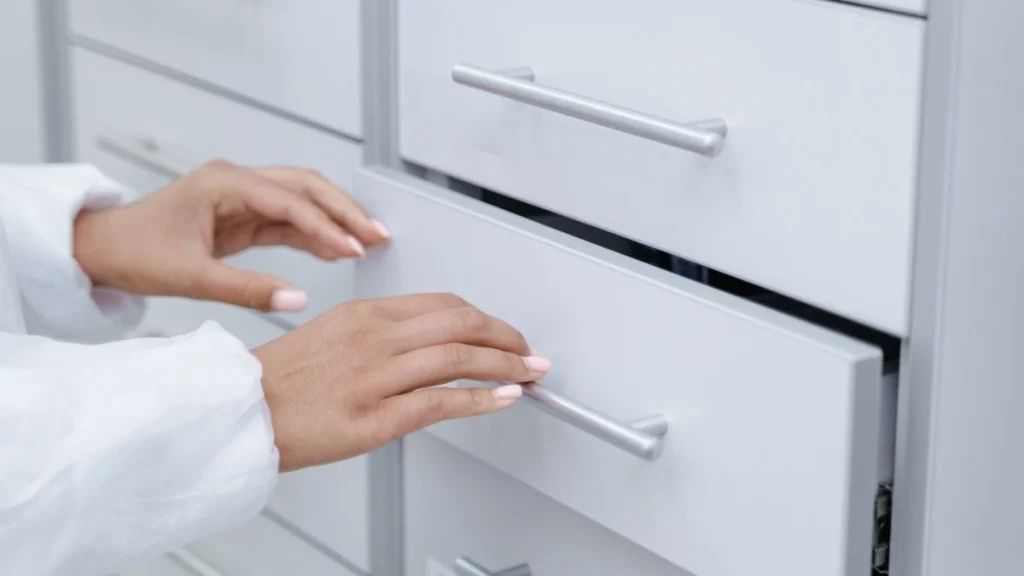
Small details trick the eye into seeing a luxury price tag on budget furniture. Standard plastic legs instantly ruin the illusion and give away the Swedish origins of your cabinet. You need to upgrade the contact points where the furniture touches the floor and your hands.
Replacing standard builder grade hardware is the number one most cost effective decor upgrade. Interior designers at Apartment Therapy constantly recommend swapping out factory pulls for solid metal alternatives. This simple swap elevates your custom living room storage instantly.
Source solid brass or matte black furniture legs to support the heavy frame. Metal legs add significant weight and visual anchor to the bottom of the piece. They lift the cabinet off the floor and make the whole room feel much larger.
Hardware placement is critical for achieving a modern, sophisticated look. Instead of drilling holes right in the center of your beautiful new wood texture, consider alternatives. Edge pulls attach to the top lip of the door and keep the fluted front clean.
If you prefer traditional knobs, place them precisely in the upper corners. Measure carefully and use a template to ensure every knob is perfectly symmetrical across the unit. Crooked hardware is an immediate giveaway for amateur construction.
Now that the piece is completely built and painted, it is time to place it.
Styling Your Custom Credenza Like a Designer
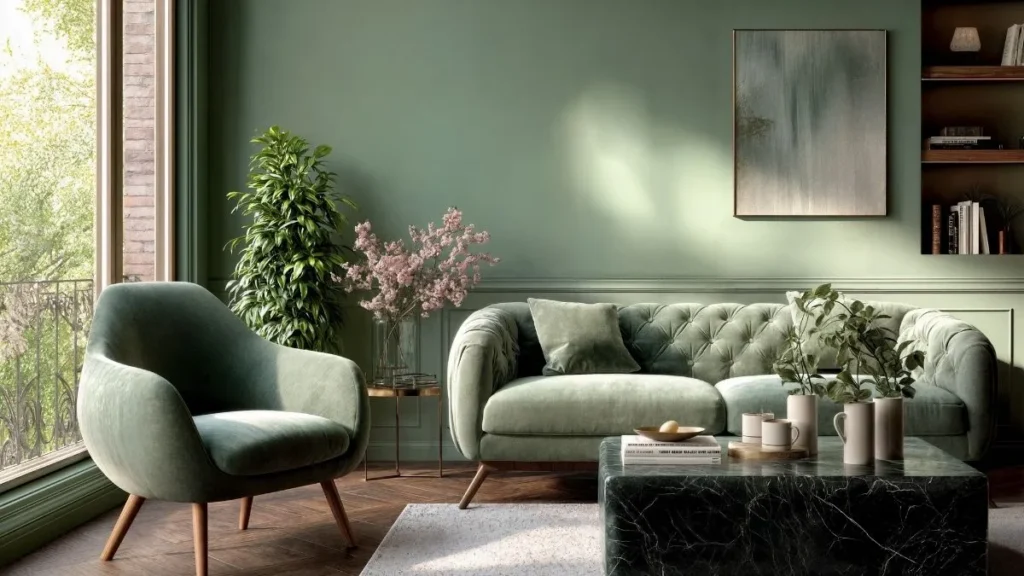
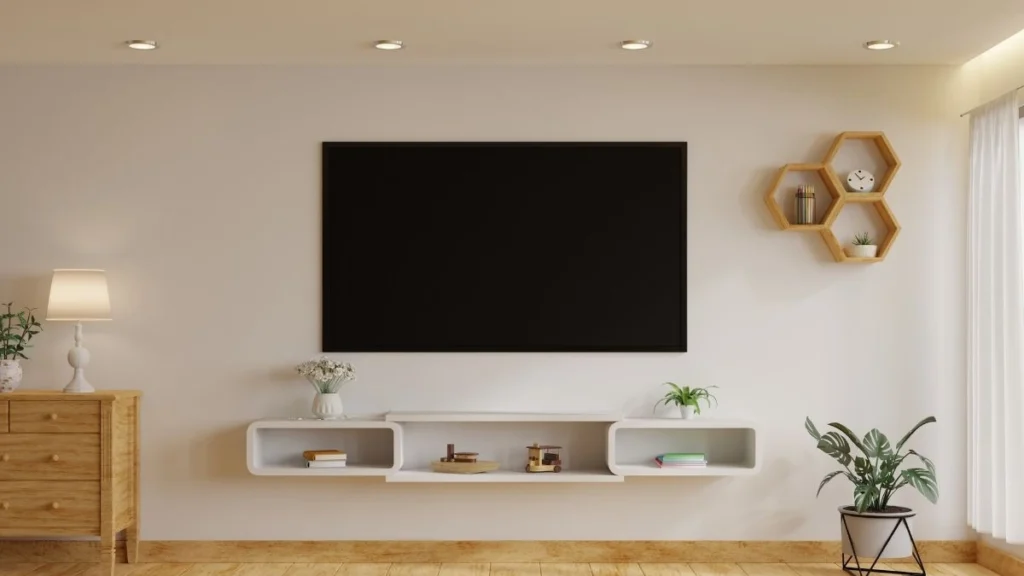
Your finished piece now sits perfectly in your living room waiting for the final touches. Styling the flat top surface properly is what separates amateur decor from professional interior design.
You should follow the rule of thirds to create visual balance without cluttering the surface.
Start by anchoring the setup with a large focal point on the wall behind it. An oversized round mirror or a curated gallery wall draws the eye upward immediately. This balances the visual weight of your heavy DIY fluted sideboard on the floor.
Bring life to the hard edges by adding an organic element. A trailing pothos plant placed on one corner softens the rigid vertical lines of the wood. The green leaves pop beautifully against the painted surface of your IKEA BESTA hack.
Create height variations by stacking large hardcover coffee table books. You can use these book stacks as pedestals for decorative bowls or small sculptural objects. Varying the height keeps the eye moving across the entire arrangement naturally.
Finally, add a dedicated light source to create warmth in the evening. Rooms with layered lighting feel significantly larger to occupants according to the American Lighting Association. A structural table lamp makes the space glow beautifully at night.
The DIY Masterpiece
From Construction to Styling Touches
Create Staggered Pedestals
Create height variations by stacking large hardcover coffee table books. Using them as pedestals for sculptural objects keeps the eye moving naturally.
Design the Ambiance
Add a dedicated light source like a structural table lamp. Rooms with layered lighting feel significantly warmer and larger to occupants at night.
Prep the Surface
Always remember that a shellac based primer is completely non negotiable to ensure proper adhesion when painting over glossy laminate surfaces.
Work Smarter, Not Harder
Investing in rolled pole wrap saves countless hours of measuring and cutting individual wood slats. You can build a masterpiece and save over a thousand dollars.
You just created a masterpiece and saved over a thousand dollars in the process.
Building high end furniture at home is entirely possible when you follow the right steps. Always remember that a shellac based primer is completely non negotiable for laminate surfaces.
Investing in rolled pole wrap saves you countless hours of measuring and cutting individual wood slats.
The final secret lies in the details you choose to add at the end. Upgraded brass hardware and solid metal legs seal the luxury look for good. Your guests will never believe what is hiding underneath that beautiful ribbed exterior.

